|

*Step 1
Open the supplied picture.
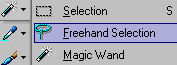
Get your selection tool and select Freehand Selection
Take over these settings:

Now it's the purpose that you select the lady out of the background.
Put de first mark (click left) for instance left under and go up
then.
Every time you click left there will be a point in your line, that
will fix your line
Try to work precise. With Delete on your keyboard you can go back
one step or more if necessary.
If you've never (or just a few times) done this, its a very
difficult job
End on the point where you've started so your selection can close.
Click with right when you're
finished and the selection will be around the lady.
*Step 2
Let your selections where it is and go
to:
File - Export - Custom Brush.
Give your brush a name and fill in the number 32 as step size.
At author you can fill in your own name and let the rest empty
Now your picture will be at the Brush tips automatically.
*Do you want a tube of the lady also?
Let your selection stand where it is, click with right into the selection
and choose copy.
Click somewhere in the gray work area with right and choose paste
as a new layer.
Then - File - Export - Custom Brush and give it a name.
*Step 3
Now you can close all pictures of the
lady.
Open a new image 400x400 pixels.
Foreground color at #79bbf3
Background color at #808080
Foreground color on gradient Foreground - Background
Choose Style Linear (first square) and set the angle on 45, Repeats
on 0
Flood fill the image with the gradient.
Effects - Texture effects- Blinds (6, 24, mark horizontal and light
from left top, color is black)
Step 4
Add a new raster layer.
Background color on red.
Go to the selection tool and create a big square on your image.
Leave some space on all sides, and some more space at the upperside.
Flood fill the selection with the gradient.
Effects - Texture effects - Blinds (6, 24, mark light from left top,
color is
white)
Effects - Geometric effects - Skew (horizontal, 25, color black)
Selections - select none
Now select the both black corners with your magic wand. By holding
SHIFT you can select them both.
Flood fill the both corner with the gradient.
Effects - texture effects - blinds (6, 24, mark light
from left top, color is black)
Image - Resize - 40%.
Mark resample using and choose bicubic
Mark Lock aspect ratio too
Do not mark resize all layers!
Now drag your resized square to the left upper corner
Click in your layer palette on the layer with the square and choose
duplicate
Drag this square to the right upper corner
Duplicate this square in your layer palette too
Image - Mirror
Image - Flip
Image - resize - 70%
Drag this square so, that it overlap the both other squares.
Effects - 3D effects - Drop shadow (1-1-65-1)
Add a drop shadow to the the other squares too, but repeat the drop
show here with a minus for the
horizontal and the vertical.
*Step 4
Add a new raster layer
Layers - arrange - bring to top
Make black your foreground color
Go to the tool paint brush and search in the settings to the lady
that you've made
Click with left in your image and the lady will appear.
Because you put her on a new layer, you can move her.
Drag her to the corner left under
*Stap 5
Add a new raster layer.
Make white your foreground color.
Select your text tool (A) en search for a nice font at the settings
Create as Floating, the direction is horizontal and down
Type the text "Greetings" in the first red square. Make sure it
fits.
I used the font Charlesworth, size 16
Let the selection around the characters
stand and select your Raster Deform Tool.
Take the first option, Deform
Now there will be a window around your
characters. When you go over it with your mouse on the right site,
you will get two round arrows.
Click there with left and you can rotate your letters slope (pff, I
hope I translate this alright)
You probably get a mention that it must first be a normal layer, you
can answer yes.
If your text is how you like it, then click at the hand (pan) and
everything is normal again
Effects - 3D effects - drop shadow (1-1-65-1) Do this drop shadow 2
times
Go back to your text tool en type the word "from" and drag in to the
middle square.
You can let this one straight, but you must do the step with the
drop shadow.
In the third square you type your own name
Go to the Raster Deform tool and deform your text again, but now the
other way
Add the drop shadow again
Layers - Merge - merge all (flatten) en resize if you want too
Your creation is finished.
Now you know how to make a tube
and a brush and how the deform works.
I really hope that you've learned something
And I hope that my translation is readable.
Please mail me if I've made mistakes?
|

